
How to Make a Lighted Floral Hula Hoop Chandelier
Wedding tents, pergolas, and porches are perfect places for this dreamy DIY chandelier.
With just a hula hoop, a string of icicle lights, and a handful of accessories, you can create a lighted garland-style centerpiece that brings a soft, romantic glow to any summer celebration.
Materials
- Hula Hoop (any size; ours was just over 2 feet in diameter)
- A string of icicle lights on either white or green wire
- Wire ties, twist ties, or velcro ties
- Ribbons, tulle, or wired floral ribbon (optional)
- Twine, ribbon, or fishing line for hanging
- Faux flowers or greenery (optional but lovely)
Instructions
1. Prep your hoop.
If you're using a colorful toy hula hoop, you have options! We peeled the tape off ours and found a clean white surface underneath—perfect for a wedding-themed project.
If your hoop is brightly colored, consider wrapping it in white ribbon, tulle, or giving it a quick coat of spray paint to match your color scheme.
We were happy to see that removing the green tape wrapping the hoop was easy.


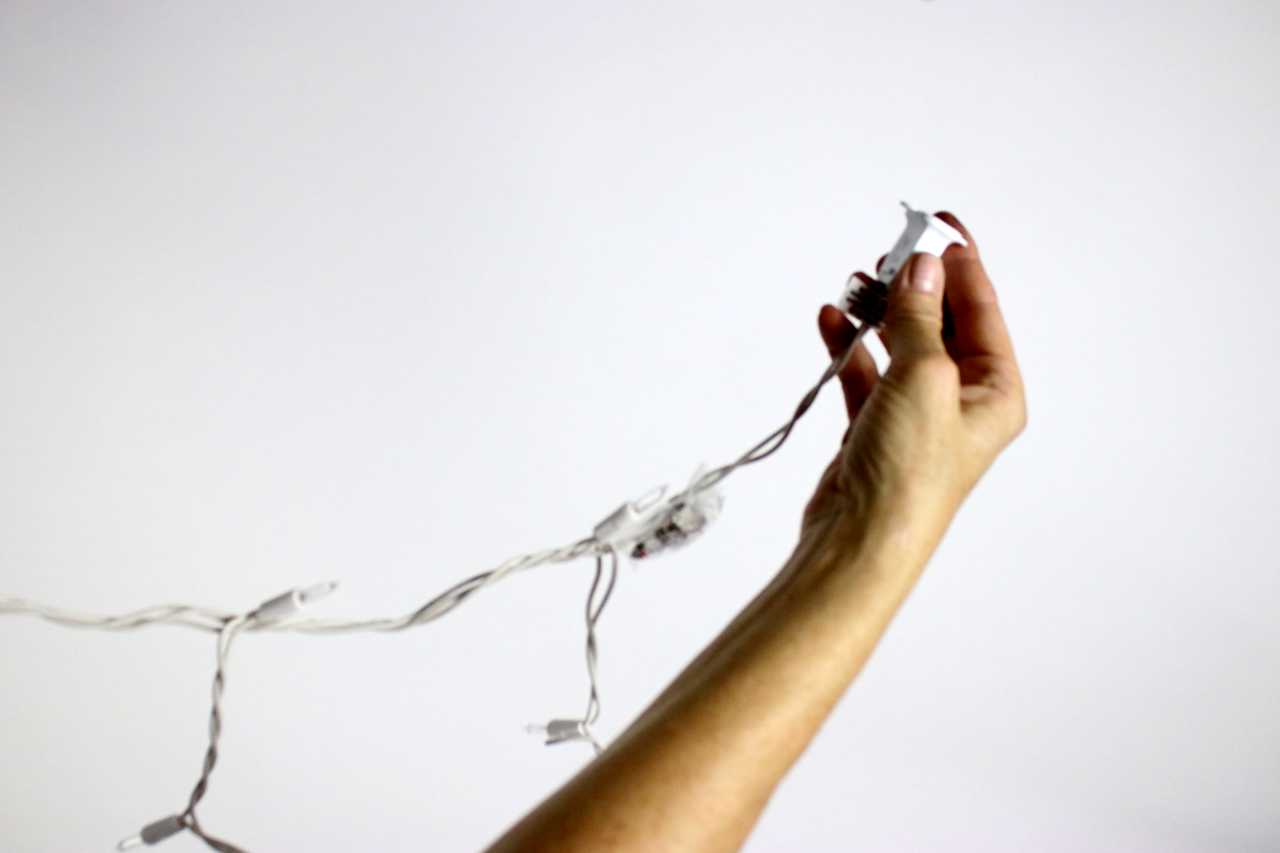
2. Test and prep your lights.
We used white icicle lights on white wire for a soft, elegant effect. Before attaching, untangle and test your lights. These sets are built on three circuits, so you may need to untwist a few ties along the way.


3. Attach the lights and flowers.
We used the twist ties that are used to secure the lights at the factory, cut into thirds, to attach the main wiring harness (the part with three wires) to the hoop.
Make sure you’re securing the main wire and not one of the icicle drops—you’ll avoid a lot of backtracking that way!
You can also use Velcro ties, zip ties, or twine for a more rustic look.

We used twine to attache the flower steams.

You may already have tulle ribbon in your craft stash!

Tips: Start with the female end on projects so the male plug will be hanging free to plug into an extension cord.
Loop your tie through the main wiring harness to help it stay in place.

And just keep going!


After one full rotation around the hoop, we still had quite a bit of icicle light string left. We simply continued winding it around the hoop a couple more times, adjusting the ties as we went.

5. Add a tulle ribbon hanger.
This is the minimalist final light fixture - perfect for the peaks of wedding tents and 10-foot easy-up tents as well.


Optional Add-Ons (Highly Recommended!)
-
Tulle Ribbon Wrap: Soften the look of the lights and disguise the wires.
-
Wired Floral Ribbon: Adds movement and elegance—especially in an outdoor breeze.
-
Faux Flowers: Our favorite! We tied on whimsical bunches of summer flowers with twine. It felt like making a giant flower crown, and the result was worth every moment. (And no, we didn’t skip through a meadow—just found a good deal at the craft store with a 40% off coupon.)
For weddings, consider matching the faux blooms to the bride’s bouquet and assembling the chandelier in advance.
Adding Decorative Ribbon, Flowers, and Tulle
The "chandelier" with tulle.

Hiding the hula hoop with ribbon.

Flowers and twine!

Adding more flowers.....

Dimming the lights!

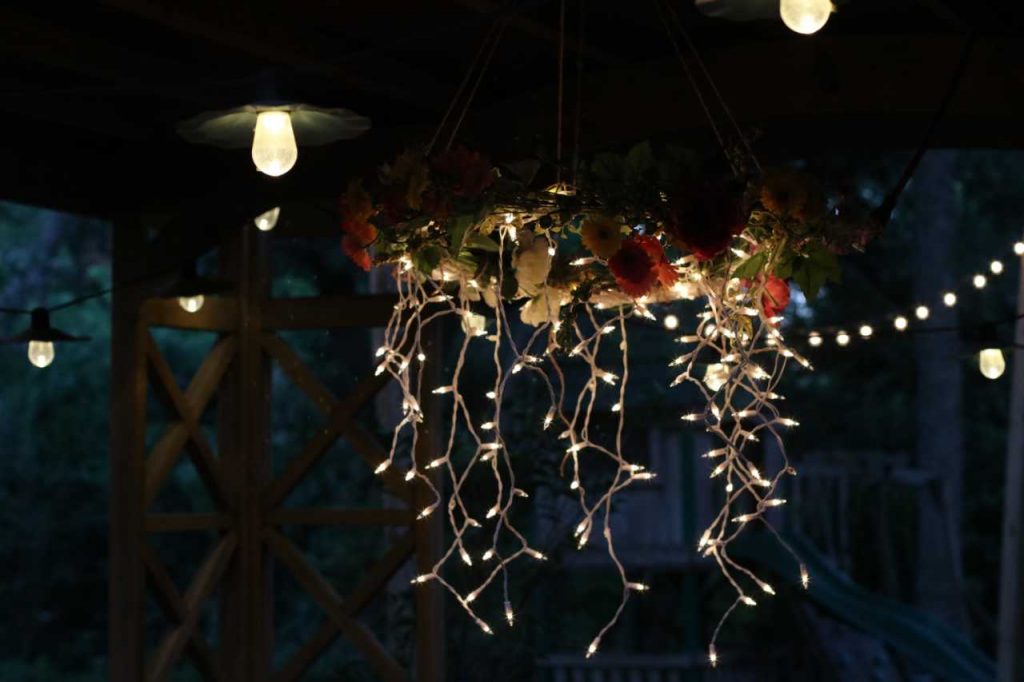
The Finished Look
As the sun set, the chandelier truly came to life.
It drew compliments from guests and cast a soft glow over the patio. One friend even said it looked like a medieval flower crown hanging from the sky—now that’s a win in our book.
We’d love to see how you bring this project to life!


Originally released July 19, 2019. Updated and re-released on June 16, 2025